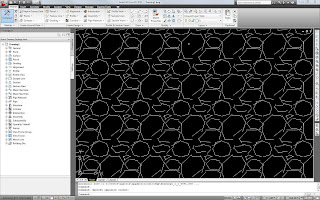
Here’s a close up view of a gravel hatch pattern where the closed objects appear broken and jagged.

Recommended fix can be found at...
http://usa.autodesk.com/adsk/servlet/ps/dl/item?siteID=123112&id=10100419&linkID=9240617
Solution
To resolve this problem, change the origin of the hatch pattern. To do this, you can either move the hatch origin to the hatch boundary or specify a point to be used as the hatch origin.
To move the hatch origin to the hatch boundary
1. Double-click the affected hatch.
2. In the Hatch Edit dialog box, under Hatch Origin, verify that the Specified Hatch Origin option is selected.
3. Select the Default to Boundary Extents check box.
4. Click OK.
To specify a point to be used as the new hatch origin
1. Double-click the affected hatch.
2. In the Hatch Edit dialog box, under Hatch Origin, verify that the Specified Hatch Origin option is selected.
3. Click the Click to Set New Origin button.
4. Click a point that is closer to the hatched object.
5. Click OK.
Another option which I’ve found to work equally well is to select the affected hatch pattern or patterns then right click to obtain a popup menu. In that menu select “Set Origin” then click anywhere near your hatch pattern. Your hatch should automatically update. Give it a try.
